- Love the Indies
- Posts
- How to Choose the Right Paper for Your Zine
How to Choose the Right Paper for Your Zine
Still not sure which paper to use? Let’s figure it out together.
Yusuke Nagata
October 07, 2025
When making a zine, one of the hardest decisions is choosing the right paper.
Part of me always whispers, “It’s a zine, just print it on a copier and call it a day.”
But another part of me says, “Since you’re going through all the effort, why not pick a paper that matches the world you want to express?”
Even now, I still struggle with paper selection. But this time, I’ll walk you through how I usually choose paper for my own zines.
Table of Contents
FED: Photo of the Week
On the FAR EAST DARKROOM website I run, I’ve started a new section called “Photo of the Week” on the homepage, where I feature one photo each week.
Last week’s pick was this powerful shot by David Kresses.
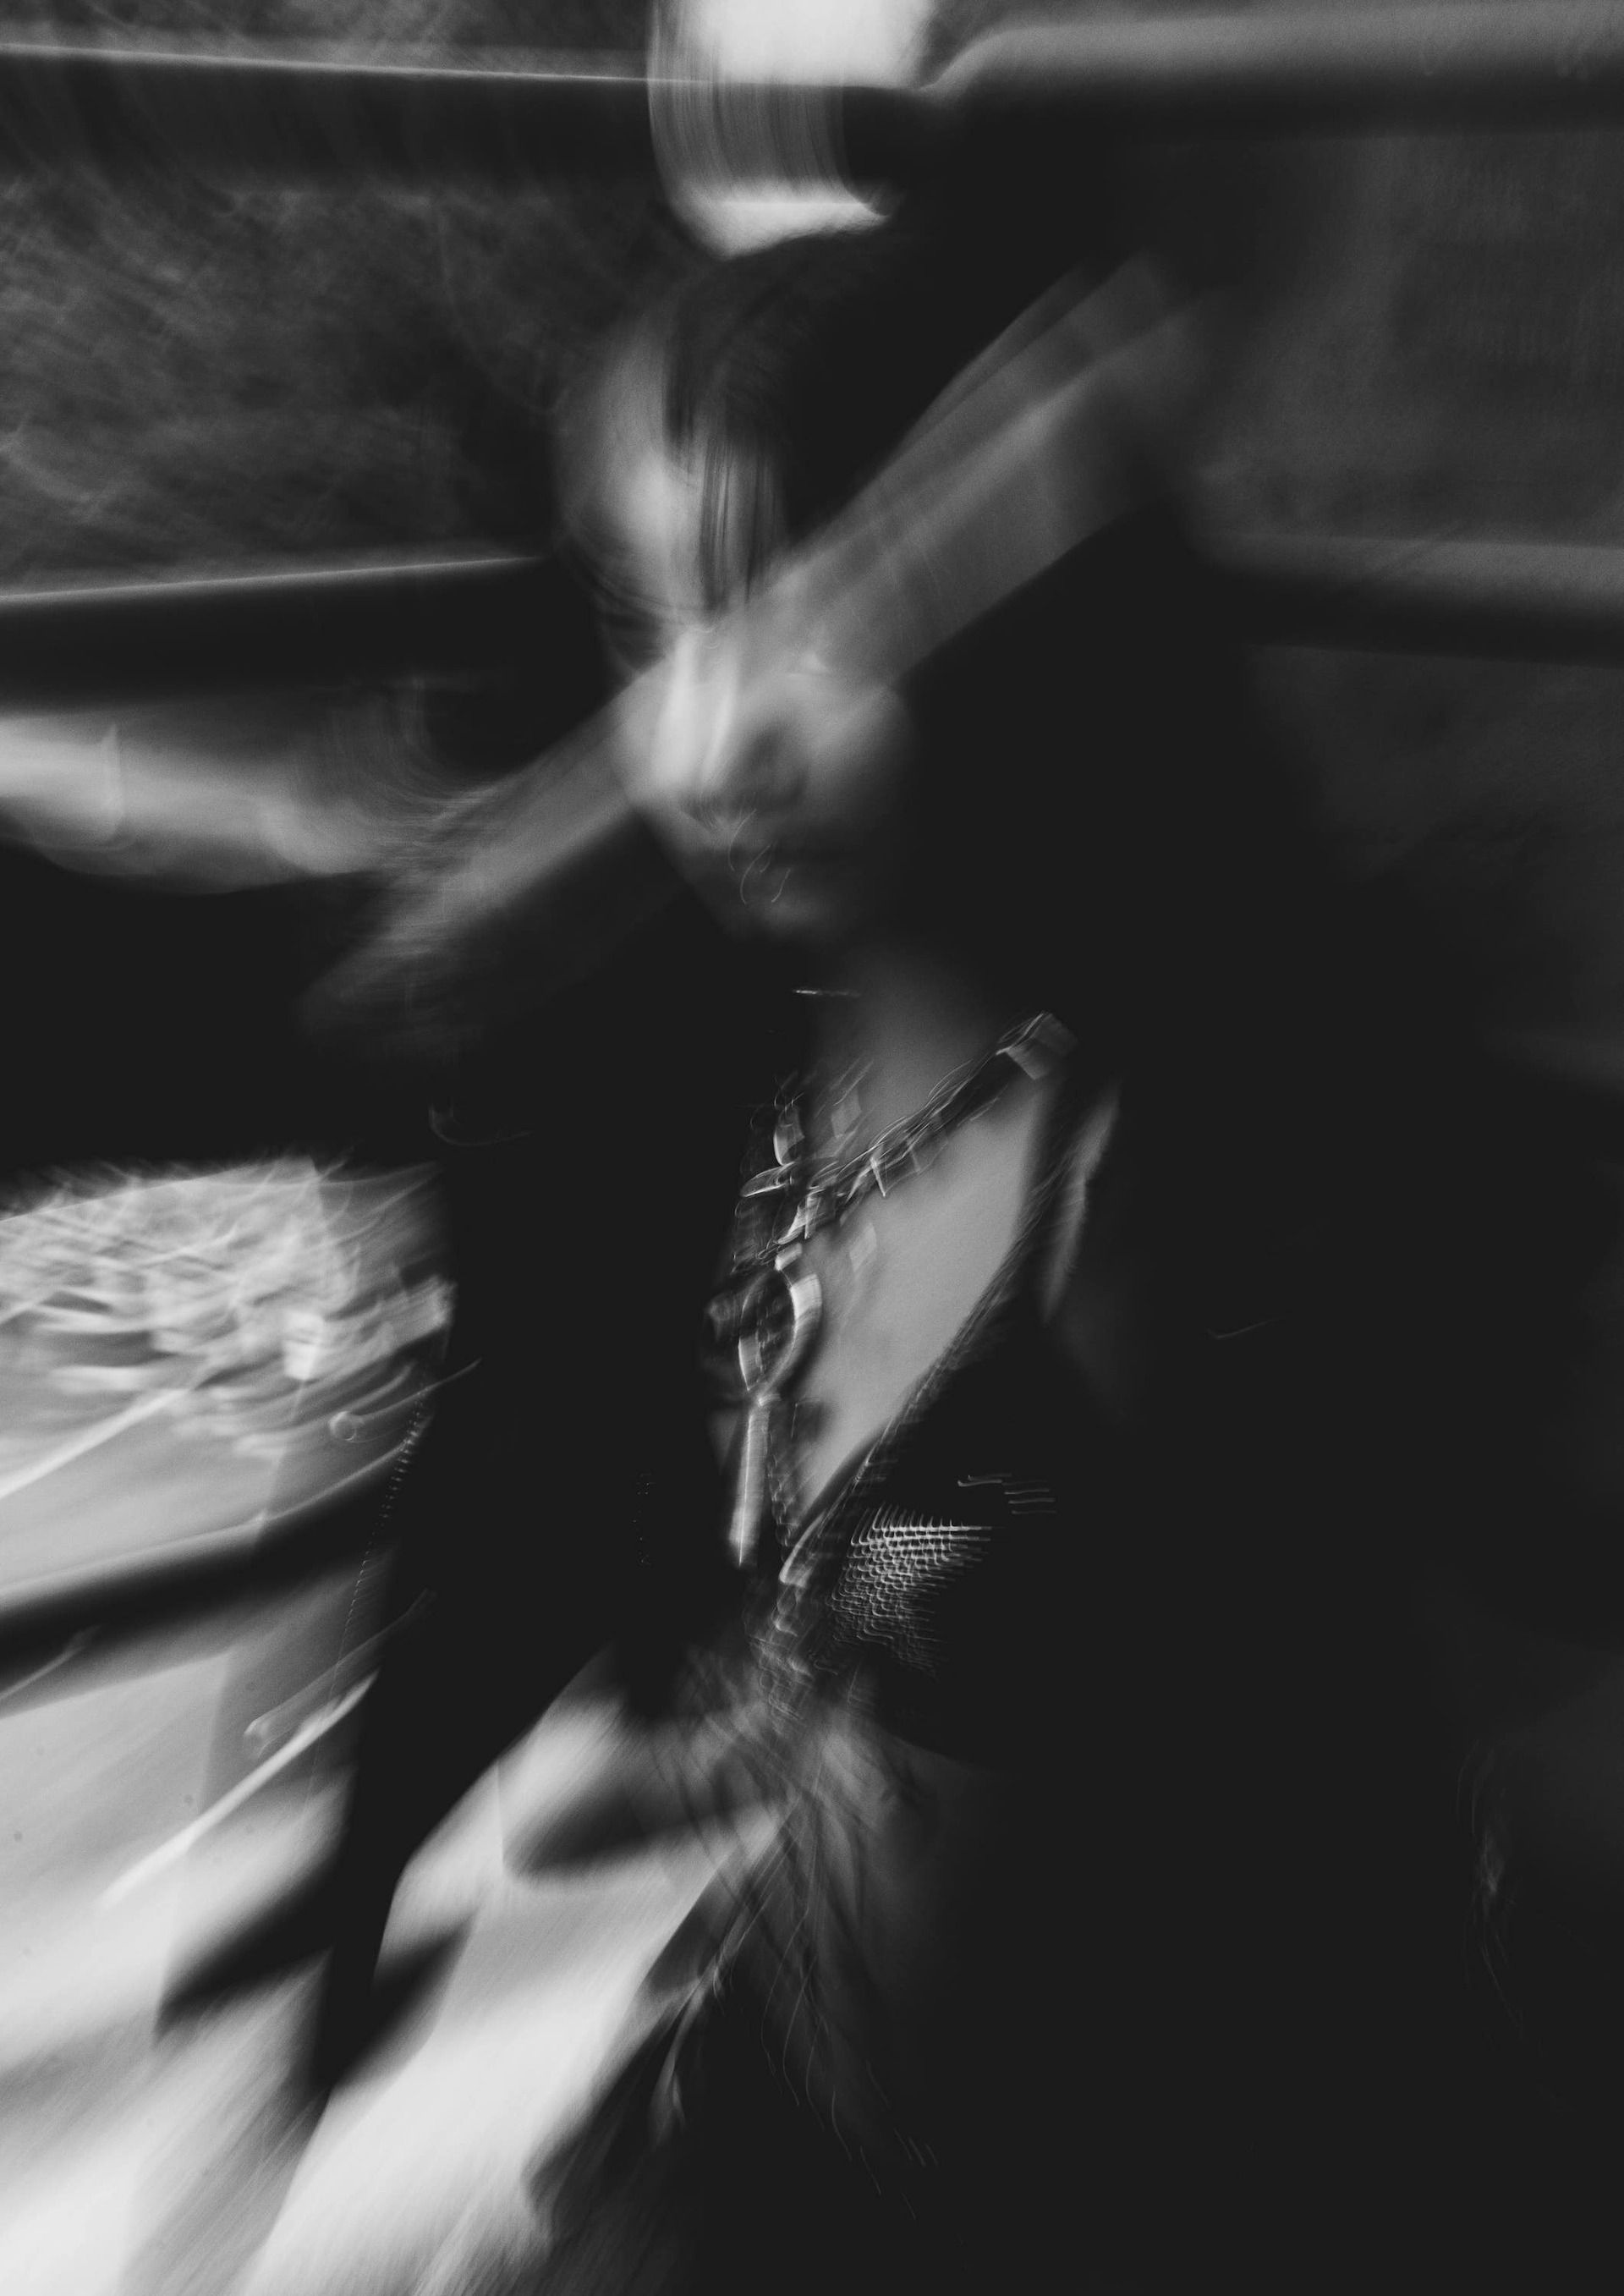
Photograph by David Kresses
So, what’s the next photo I picked?
Coated or Uncoated — Which Should You Pick?
I usually use a Japanese printing company, but for this example, let’s look at Mixam, since it’s a service many people use.
When you try to print a zine with Mixam, you’ll see an option under “Paper Type” asking whether you want Coated or Uncoated paper. If you don’t have much printing experience, you might be unsure which one to pick.
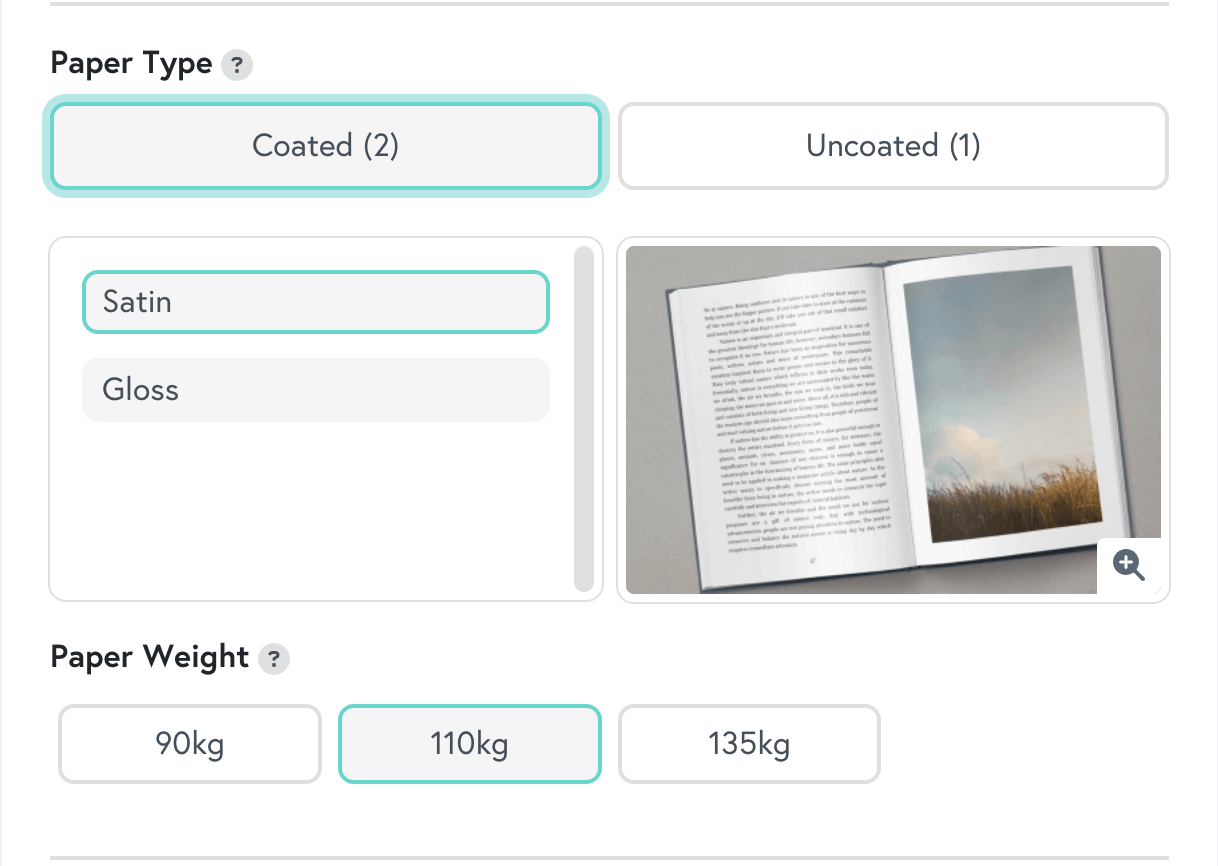
So, what’s the difference?
Coated paper is treated with a layer of mineral clay or polymer that fills the gaps between fibers, creating a smooth surface. Because the coating prevents too much ink absorption, images look sharper, colors more vivid, and contrast stronger compared to uncoated paper.
Uncoated paper, as the name suggests, isn’t treated with any coating. Its texture is rougher, with a more natural and tactile feel. The downside is that prints lose some sharpness and contrast.
From that explanation alone, you might think, “Then coated paper must be better for photos.” But remember — a zine is meant to be held. The tactile experience matters.
The biggest advantage of uncoated paper is how it feels in your hands.
Each time a reader turns a page, that texture becomes part of the experience. Whether the paper is coated or uncoated changes how your zine feels to the reader in a big way.
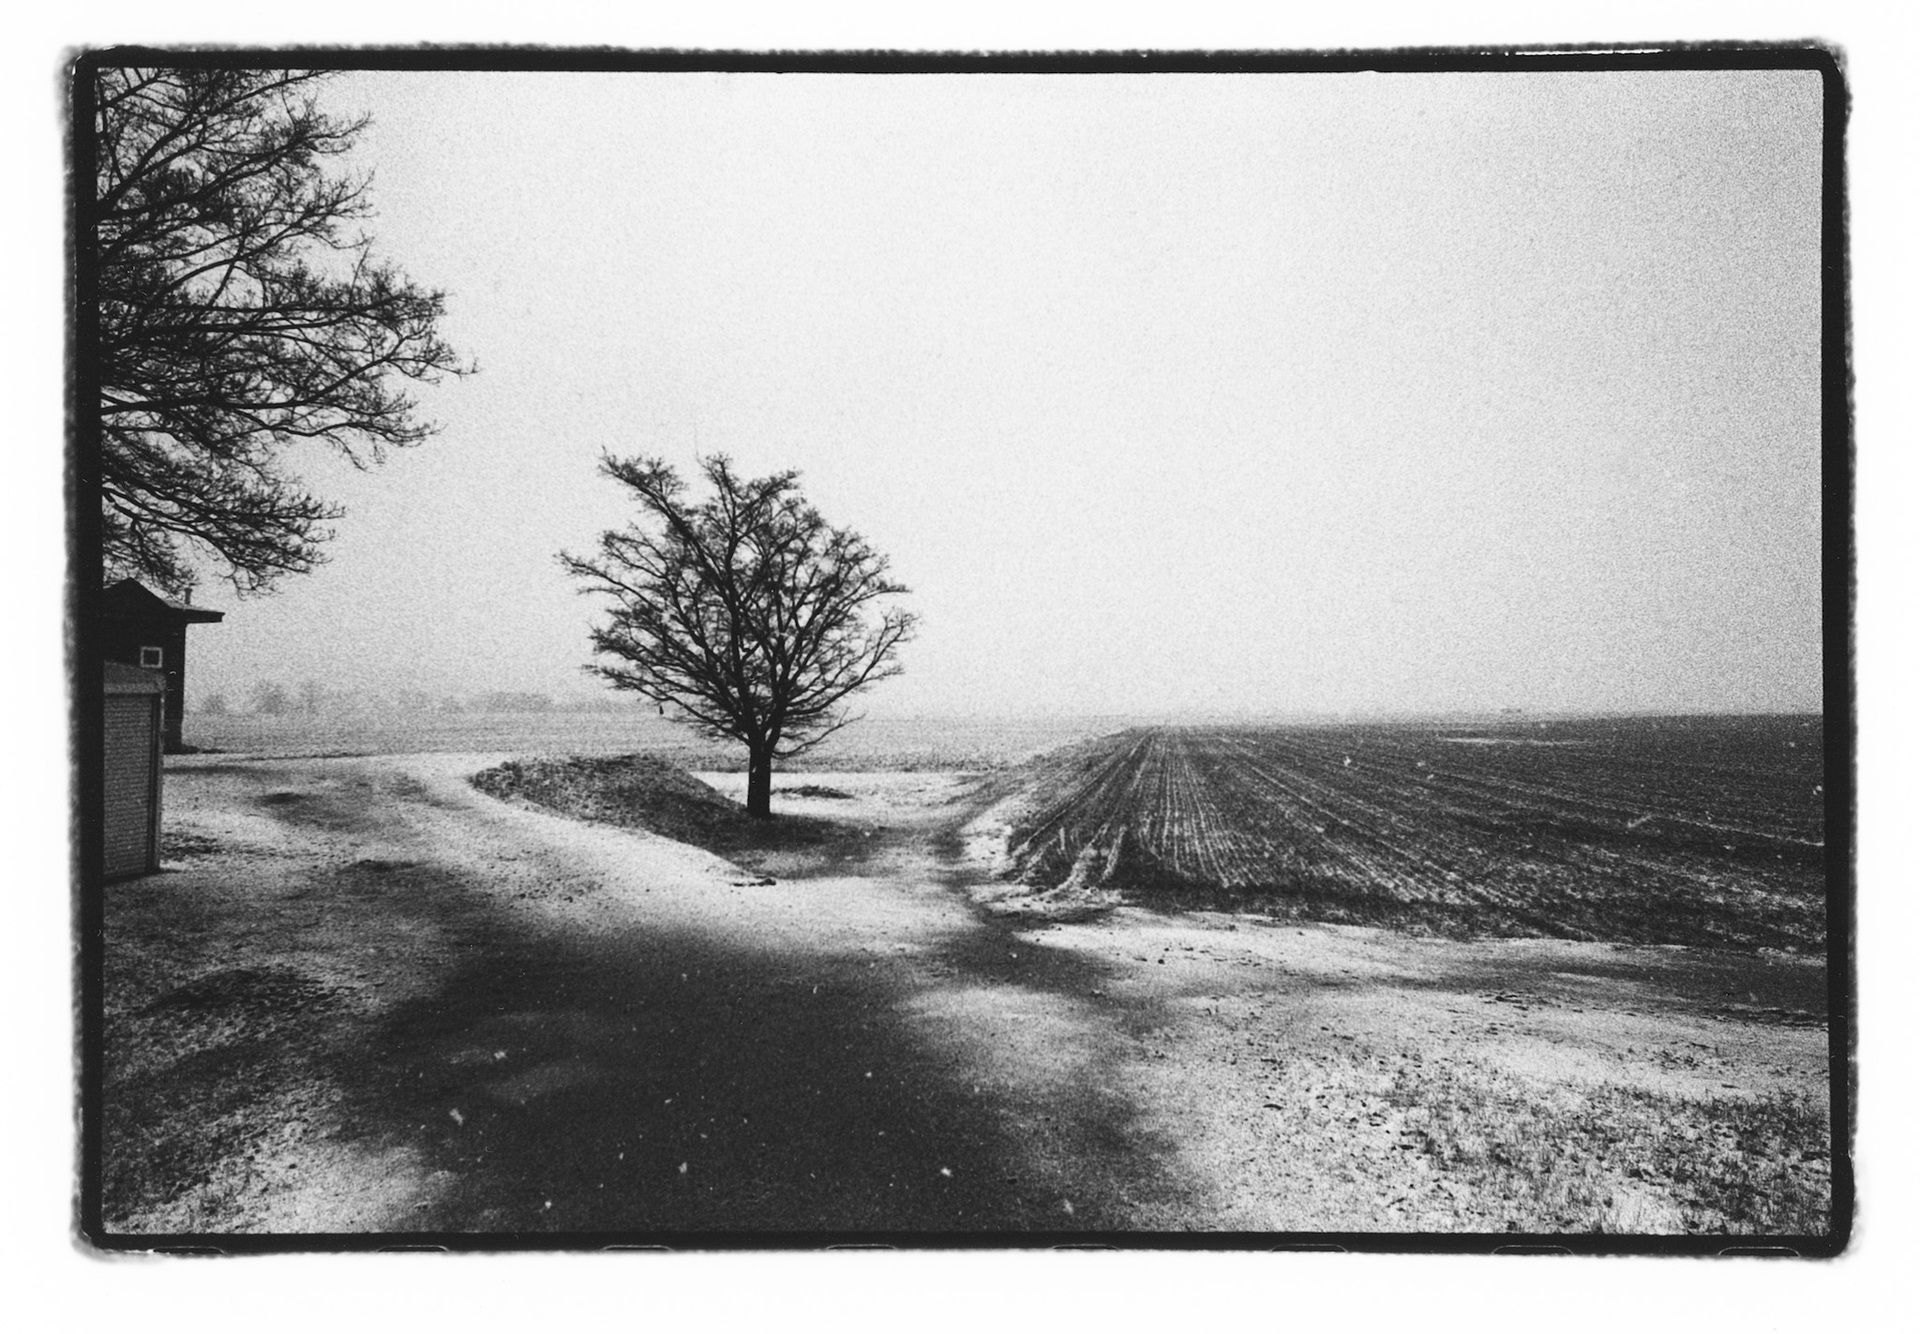
And depending on your photos, the matte look of uncoated paper might actually fit better. For example, here’s a photo I took in snowy Hokkaido. If I wanted the paper to reflect the texture of snow, I feel like uncoated paper would suit it best.
Try This
Take a look at the photo books or magazines you already own. Try to guess—just from the feel—whether the paper is coated or uncoated.
Then think about which types of photos work best with coated paper, and which feel more natural on uncoated paper.
Papers I’ve Actually Used for My Zines
I’ve never used Mixam myself, but from what I can see, they only offer three paper types: two coated options (Satin and Gloss) and one uncoated.
Of course, paper stock varies depending on the printing company. I usually print through a Japanese company called Graphic, which carries a wide selection of uncoated papers. That gives me more flexibility to match the paper to the concept of each zine I make.
Here’s a look at the papers I’ve used for some of my own zines—and why I chose them.
Paper used:
Cover — VANNOVO VG Snow White 195kg
Body — White Coated 135kg
VANNOVO VG Snow White is made by a Japanese paper company called Takeo. It’s technically a coated paper, but it doesn’t have that overly slick surface—there’s a soft, organic texture that still feels like real paper. In other words, it offers the best of both worlds: high print quality and great texture.
That said, it’s quite pricey. So for the body pages, which have higher page counts, I used White Coated (Gloss) instead. It’s a high-brightness coated paper that makes black-and-white images pop.
Since this zine is made up of monochrome film photos and contact sheets—many with strong contrast—I wanted something that would print the images sharply. For the cover, I chose VANNOVO VG Snow White because it not only handles photos beautifully but also gives the zine a sense of luxury when you hold it.
Paper used:
Cover — Matte Coated 135kg (Gloss Lamination)
Body — Matte Coated 110kg
This zine features nightclub scenes in China shot by photographer MI LU. Because all publishing in China is tightly restricted, we produced and released the zine through FAR EAST DARKROOM.
The photos are filled with flash and vivid colors, so I wanted the print to capture that energy. I went with coated paper for both the cover and the inside pages since it reproduces color beautifully.
As for satin vs gloss, that’s a matter of taste—I personally prefer less shine, so for this zine I chose a non-glossy paper.
For the cover, though, I wanted a stronger physical presence, so I added Gloss Lamination—a process that applies a thin plastic film to the paper using heat. It adds shine, protects the surface, and gives the zine a more substantial feel.
Paper used:
Cover — Arabelle Snow White 130kg
Body — Arabelle Snow White 110kg
This one’s different. Both the cover and body use Arabelle Snow White, an uncoated paper.
All the photos in this zine were darkroom-printed on fiber paper, then scanned. I wanted to carry that fiber-paper texture into the zine itself, and uncoated paper was the best fit for that.
It’s a zine you can really feel as you flip through it—the texture adds warmth to each page.
For the cover, I even made a handmade tracing-paper jacket. The cover photo was shot around 6 a.m., with an abandoned building’s chimney(actually an observation elevator) wrapped in morning fog.
To capture that foggy atmosphere, I used translucent tracing paper for the cover, and it turned out exactly how I imagined. This one’s still one of my favorites.
Order Just One Test Copy First
Even after reading all this, you might still be unsure which paper to use for your own zine. In that case, here’s what I often do: order just one copy first and see how it turns out.
Making a test copy lets you check not only the paper texture but also the overall print quality. And if the printing company offers a wide range of paper options, they often have paper sample books available—so definitely try getting one and feel the papers yourself.
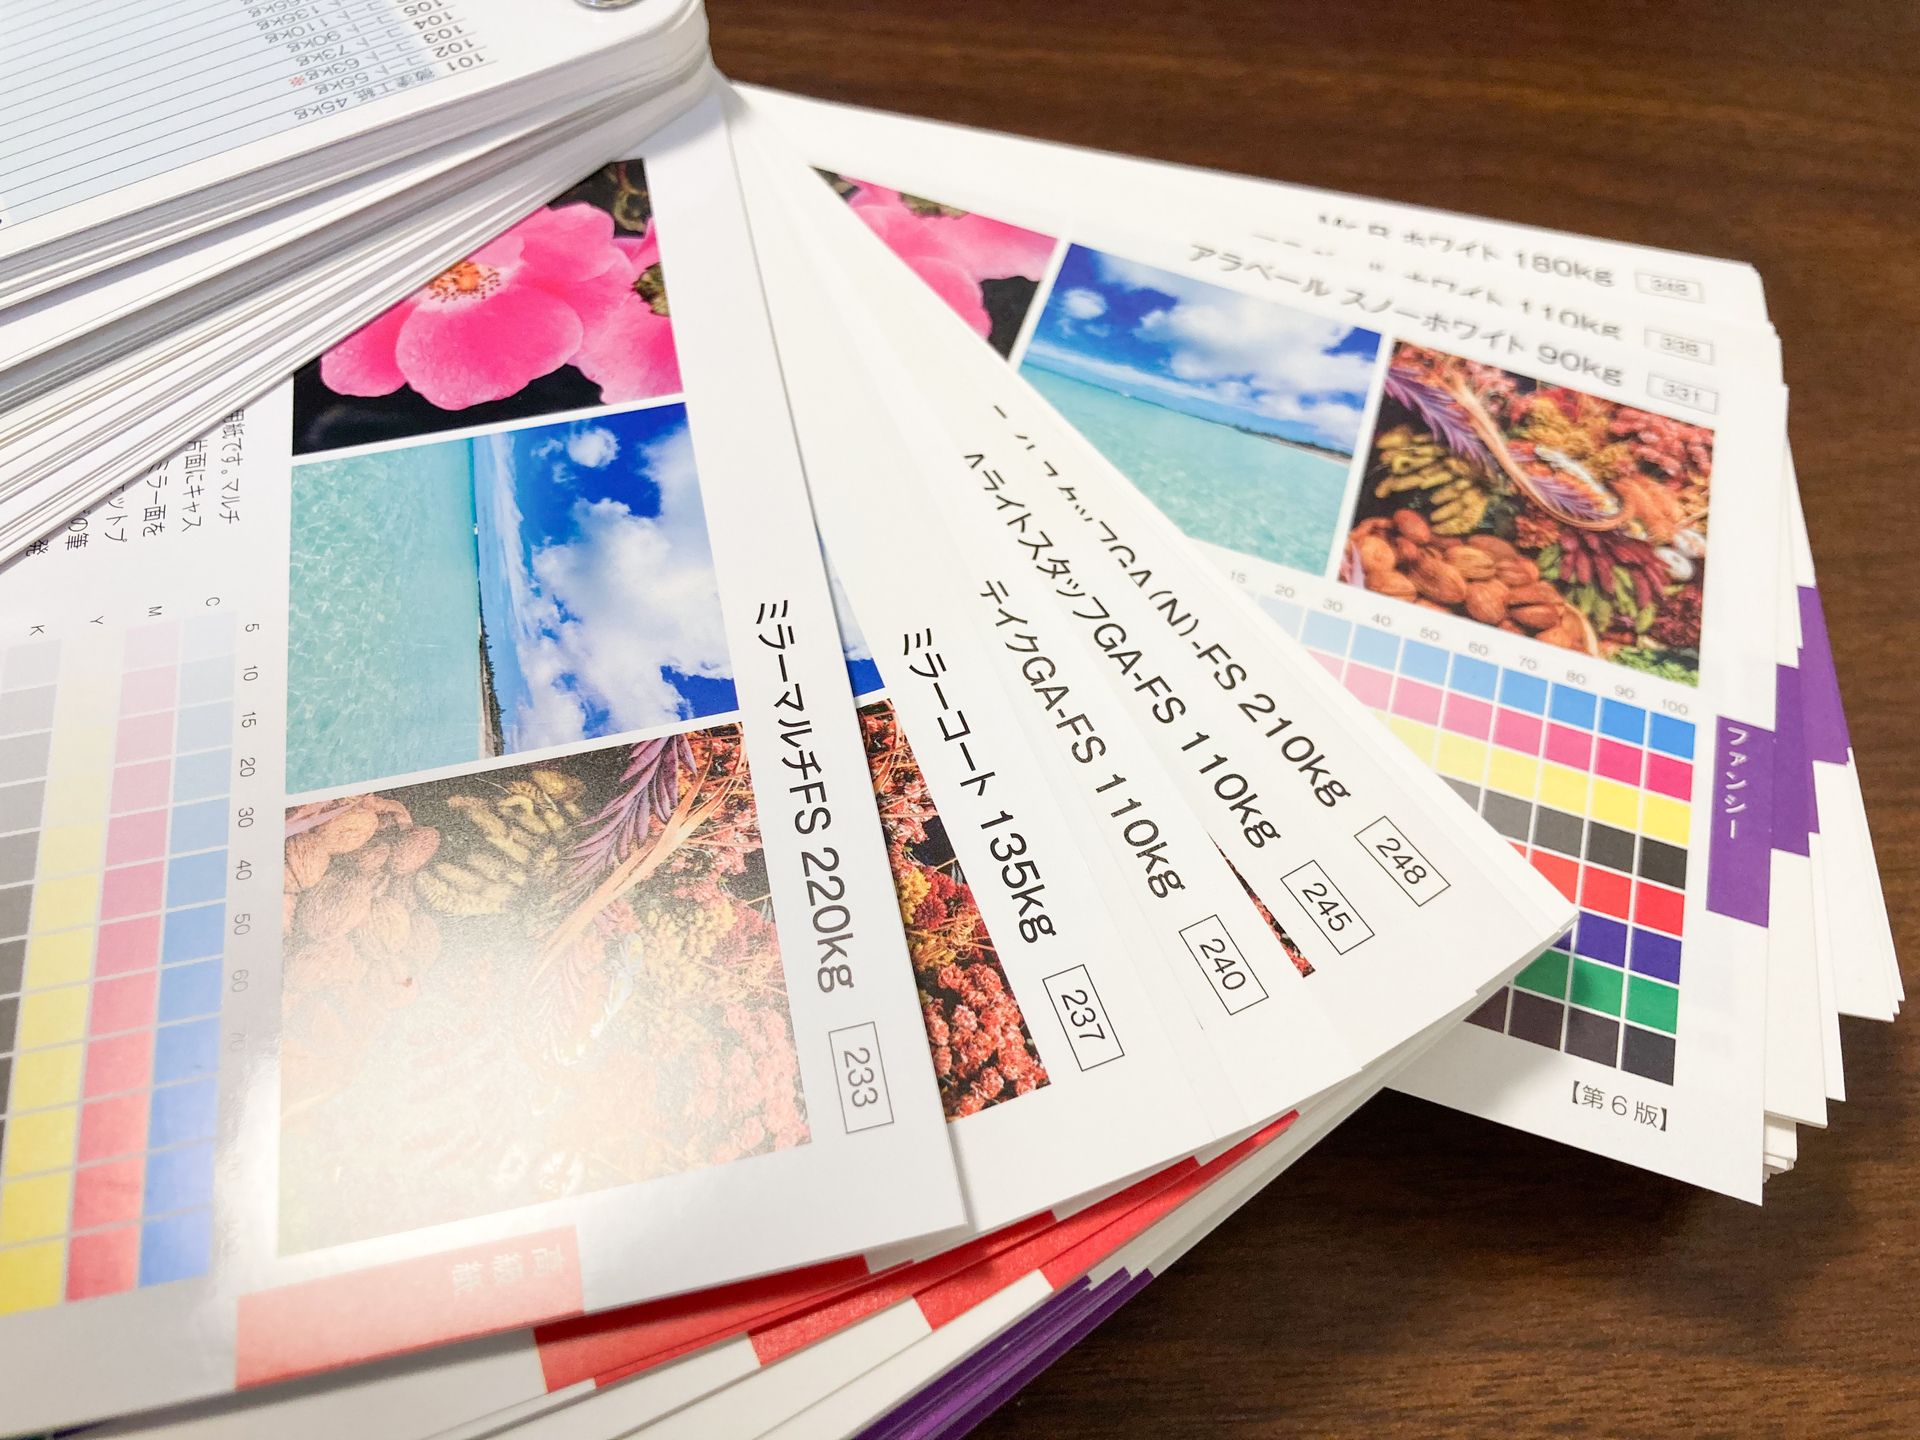
Unlike looking at a display, paper has depth and character that you can only understand by touch.
It can feel overwhelming because there are so many options, but the moment you finally find the perfect match, the joy is huge. So enjoy the process—start your zine-making journey from the paper itself.
Progress Update: My 30-Day Challenge
In my previous newsletter, I announced a 30-day challenge—to shoot photos every day and turn them into a zine. I believe deadlines are essential in zine-making.
But I’ll be honest—I almost gave up right away. Taking photos every day isn’t hard for me, but when it comes to photos for a zine, I suddenly felt this pressure to make every shot count.
Then I realized something. Some of you might have seen it on my Threads, but in my house, I have hundreds of old family photos—passed down from my great-grandmother’s time, collected from my grandmother’s house. I decided to rephotograph them and turn them into a zine.
If it weren’t for this challenge, I probably never would’ve touched those photos. I still have no idea how the final zine will turn out, but I’m already excited to see it come together.
So stay tuned for the finished project—and see you next week!
🦖 Come hang out with me on Instagram → @_nuts.tokyo_
🪐 New videos on zines & photography up on YouTube
🧃 Curious about Japanese and Asian zines? Visit FAR EAST DARKROOM.
Reply